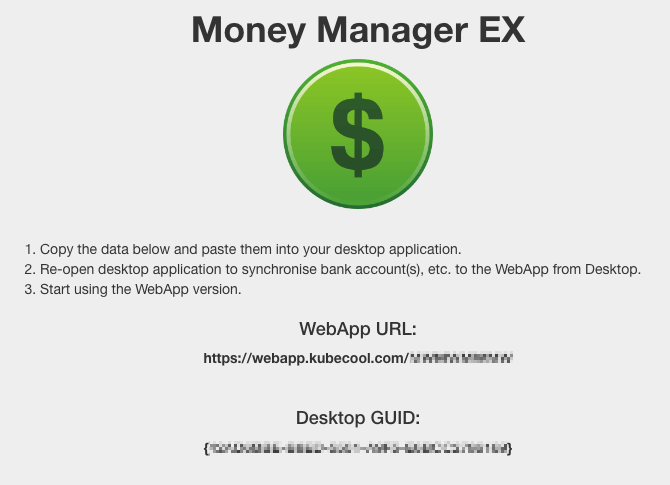
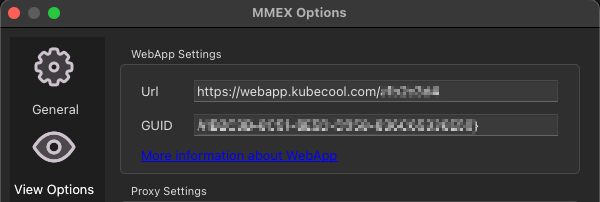
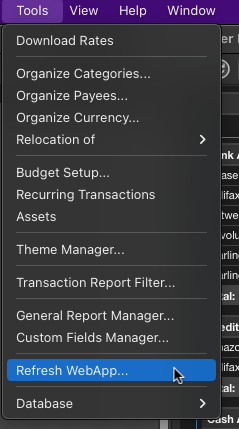
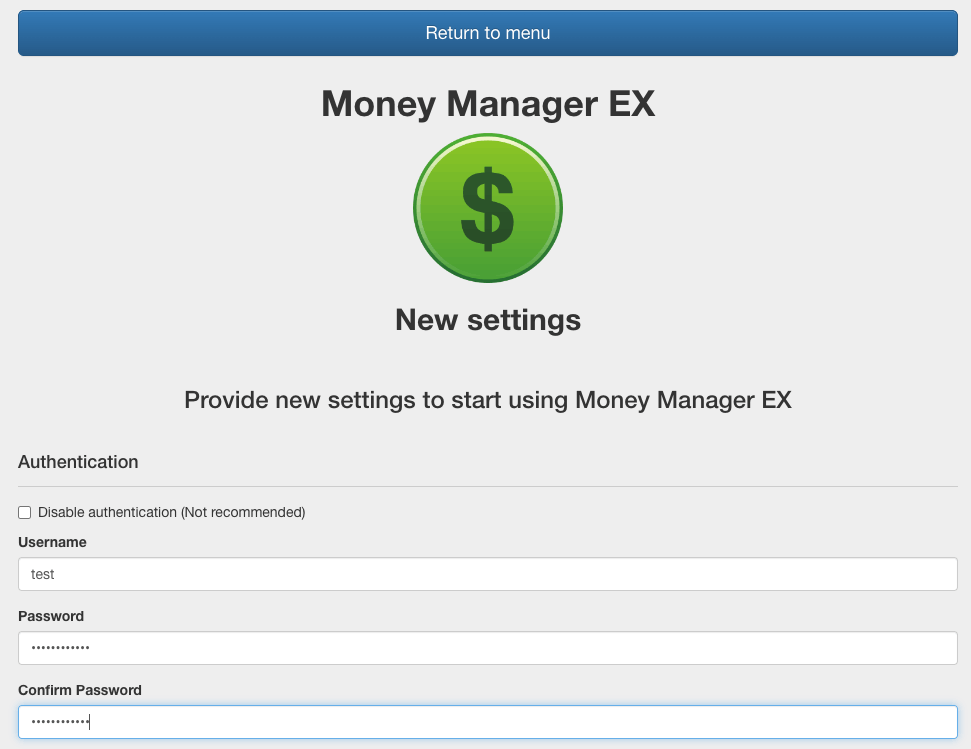
1. Create your WebApp Account

Once you are provided with your WebApp URL you need to access it as soon as possible and then secure the application by setting up a username and password.

Remember the username and password as you will need this when later accessing the application to enter new transactions.

2. Take a record of the GUID for use in MMEX desktop application

The GUID is used to associate the desktop application with the WebApp. This along with the WebApp URL is used to configure the association.

Take a note of these, they will be required when setting up the MMEX Desktop application.

3. Setup the Desktop App to sync with the WebApp

In the MMEX Desktop application open the Settings/Options and select the Network Option. In there you will find the WebApp Settings.

Enter the URL and GUID from the WebApp into these fields.

Congratulations, you are now ready to go!

4. Initialise the Web App

Initialising the Web App will copy the names of the Accounts, Payees, and Categories to the Web App for use.

The application will keep the Web App updated as these change so you should only need to do this once.